Installing Cisco Security Manager (CSM)
In this article, we will take a look at how to install the Cisco Security Manager (CSM) on Microsoft Windows Server 2019.
Note: You need to ensure that your server is configured and set up as per the Cisco recommendation or you may find that you cannot run CSM. The requirements are covered in detail here: https://www.cisco.com/c/en/us/td/docs/security/security_management/cisco_security_manager/security_manager/4-1/installation/guide/instl_wrapper/requirem.html
Once you have downloaded CSM from the Cisco Software website you will need to unzip the file and click on 'Setup'.


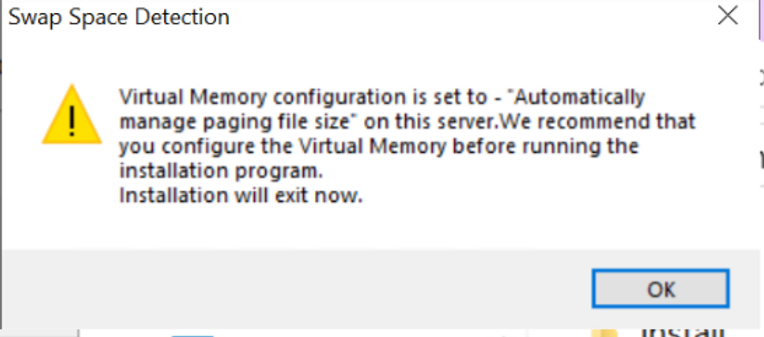
Note: You may be hit with the error displayed below if your server automatically manages paging file size.


This setting is enabled by default however, it can be disabled.
To disable 'Automatically manage paging file size for all drives' on your Windows Server, navigate to Control Panel > System and Security > System > Advanced System Settings > Advanced and under the Performance box click 'Settings'. Now click 'Advanced' tab and under Virtual Memory click 'Change'. Uncheck 'Automatically manage paging file size for all drives'. You will be required to restart/ the server before the changes take effect. You should be prompted automatically to restart the server. If you're not prompted to restart the server, you may have not applied your changes, go back and check that the settings are applied before continuing.
You should now be able to proceed with the installation of CSM. As the installation starts, you will more than likely see a few warnings. These are more than likely nothing to worry about, merely alerts to make you aware of certain elements.


Continue through the alerts until you are prompted to create a password for the admin user as well as the automated user. Once done, the installation will proceed, this usually takes upwards of 30 minutes.
You will be prompted to restart the server once CSM has been installed. Once the machine has been restarted access CSM by clicking on the desktop icon.
CSM is now installed and you should be able to access the GUI with the admin username and the password you created previously.
For a visual demonstration, watch the video below.
